
Solar Panel Installation Process: Step-by-Step Guide
From site survey and subsidy approval to mounting, wiring, net meter and commissioning — every step of a rooftop solar installation and how long each takes.
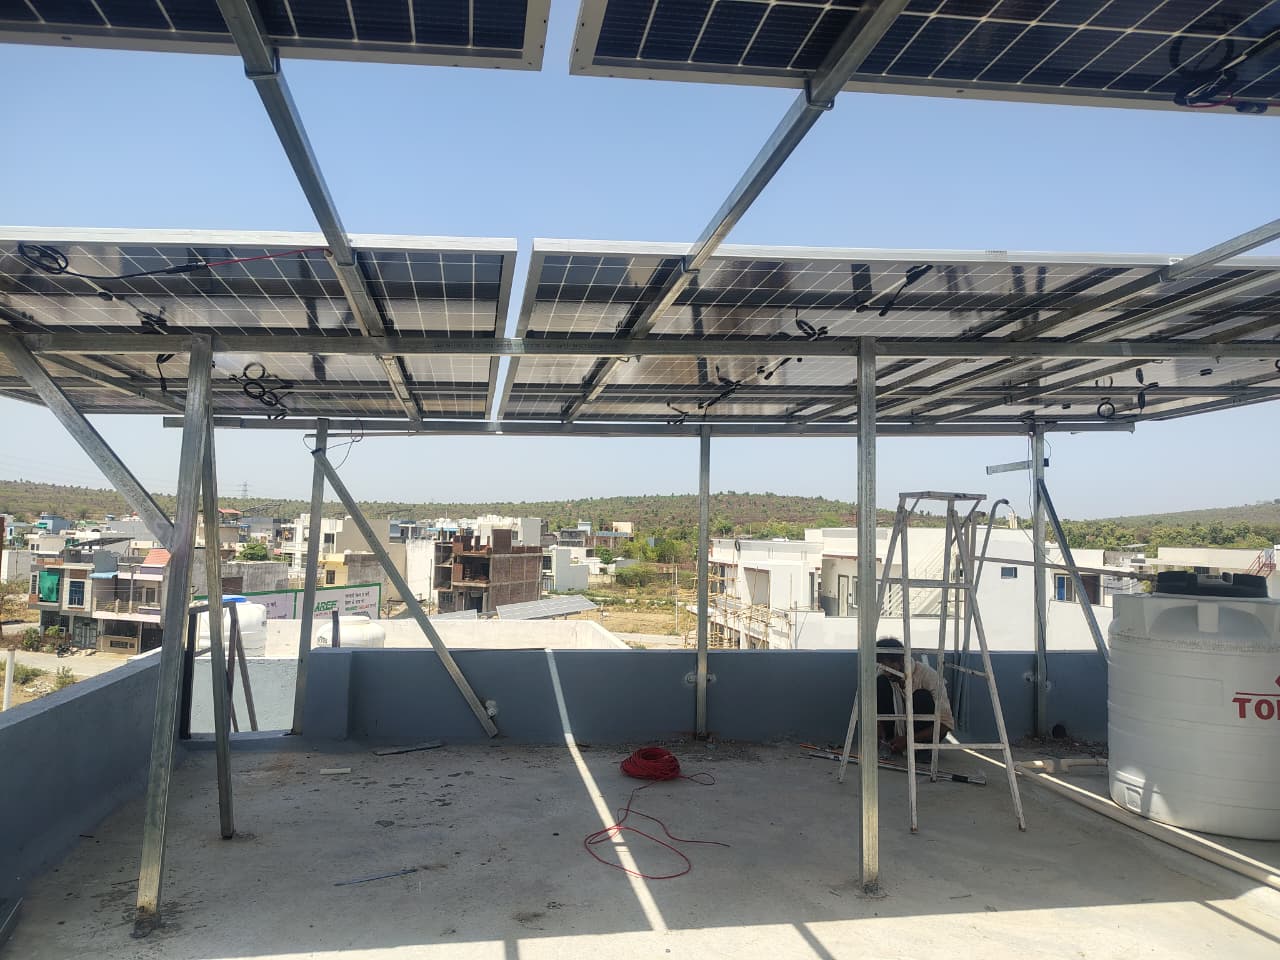
Knowing what happens during a rooftop solar installation helps you plan, ask better questions and spot corners being cut. The physical work takes only a few days, but the full journey — from first call to generating savings — involves surveys, approvals and inspections. Here is each step in order.
Overview and timeline
| Stage | What happens | Typical time |
|---|---|---|
| 1. Consultation | Understand bill and needs | 1 day |
| 2. Site survey | Roof, shade and electrical check | 1 day |
| 3. Design and quote | System size, layout, pricing | 2–5 days |
| 4. Approvals | Subsidy application, DISCOM feasibility | 1–3 weeks |
| 5. Installation | Structure, panels, wiring | 1–3 days |
| 6. Net meter and inspection | DISCOM meter and checks | 1–4 weeks |
| 7. Commissioning and subsidy | Certificate, then bank credit | Varies |
Approval stages depend heavily on your DISCOM's workload, so timelines vary.
Step 1: Free consultation
It starts with a conversation about your electricity bill, monthly units, sanctioned load, and plans such as adding an air conditioner. This sets a rough system size and budget.
Step 2: Site survey
A technician visits to:
- Measure usable, shadow-free roof area
- Check shade from water tanks, parapets, trees and nearby buildings through the day
- Inspect roof condition and structure
- Check the main electrical board, meter location and earthing
- Plan cable routes from the roof to the meter
Do not skip this step. A quote made without a survey is a guess.
Step 3: System design and quotation
Based on the survey, the installer designs the panel layout, selects the inverter, and sizes cables and protection devices. A good quotation lists:
- Panel brand, model, wattage, and DCR and ALMM status
- Inverter brand, model and capacity
- Structure material and height
- All protection equipment, earthing and lightning arrester
- Warranties and service terms
- Total price, GST, and what paperwork and fees are included
Step 4: Subsidy application and approvals
For homes claiming the PM Surya Ghar subsidy, the application is submitted on the national portal and the DISCOM checks technical feasibility. Installation should begin only after feasibility approval. Installing early is a common cause of subsidy problems. See our subsidy guide.
Step 5: Installation
This is the part you see, usually completed in one to three days for a home:
- Structure installation. Mounting frames are fixed to the roof with anchors or ballast, aligned to the designed tilt and direction.
- Panel mounting. Panels are clamped onto the rails.
- DC wiring. Panels are connected in strings with matched MC4 connectors, and UV-resistant cables are run through conduits to the DC distribution box.
- Inverter installation. The inverter is mounted in a shaded, ventilated spot, usually near the main board.
- AC wiring. The inverter connects through the AC distribution box to your home's electrical system.
- Earthing and lightning protection. Dedicated earthing pits and a lightning arrester protect the system.
- Testing. Voltage, polarity and insulation are checked before the system is switched on.
Step 6: Net meter installation and inspection
After installation, an application is made for a net meter. The DISCOM replaces your existing meter with a bi-directional net meter and inspects the installation for safety and compliance.
Step 7: Commissioning and subsidy credit
Once the inspection is passed, a commissioning certificate is issued. For subsidy applicants, bank details are then submitted on the portal and the subsidy is credited to your account.
After commissioning
- Set up the monitoring app and check daily generation.
- Check your next bills show exported units correctly.
- Keep all documents: invoice, warranty cards, commissioning certificate and net meter details.
- Schedule periodic cleaning and an annual check. Our maintenance checklist explains what to do.
Frequently asked questions
How long does it take to install rooftop solar?
The physical installation takes one to three days for a typical home. The full process, including approvals and the net meter, usually takes several weeks depending on your DISCOM.
Can I use solar power before the net meter is installed?
Generally no. Grid-connected systems are normally kept switched off until the net meter is installed and the DISCOM approves the connection. Ask your installer about the rules in your area.
Do I need to be at home during installation?
Someone should be available at the start to provide roof access and confirm the layout, and at the end for the handover. You do not need to be present the whole time.
Will there be any damage to my house?
Not with a professional installer. Cables run through conduits along neat routes, and roof fixing methods are chosen to avoid leaks. Agree on cable routes and mounting method before work starts.